Saturday 5 September 2015


Free Felt Horse Tutorial and Pattern


Pattern


Tutorial


What you will need:

Needle,
Thread.
Scissors.
Thin wire (can be pipe cleaners or U nails).
Yarn.


1. Cut each of the pieces out,

2. Line half of the 'Under body' with one of the 'Sides' and start blanket stitching from the tip of the bottom and around the legs.


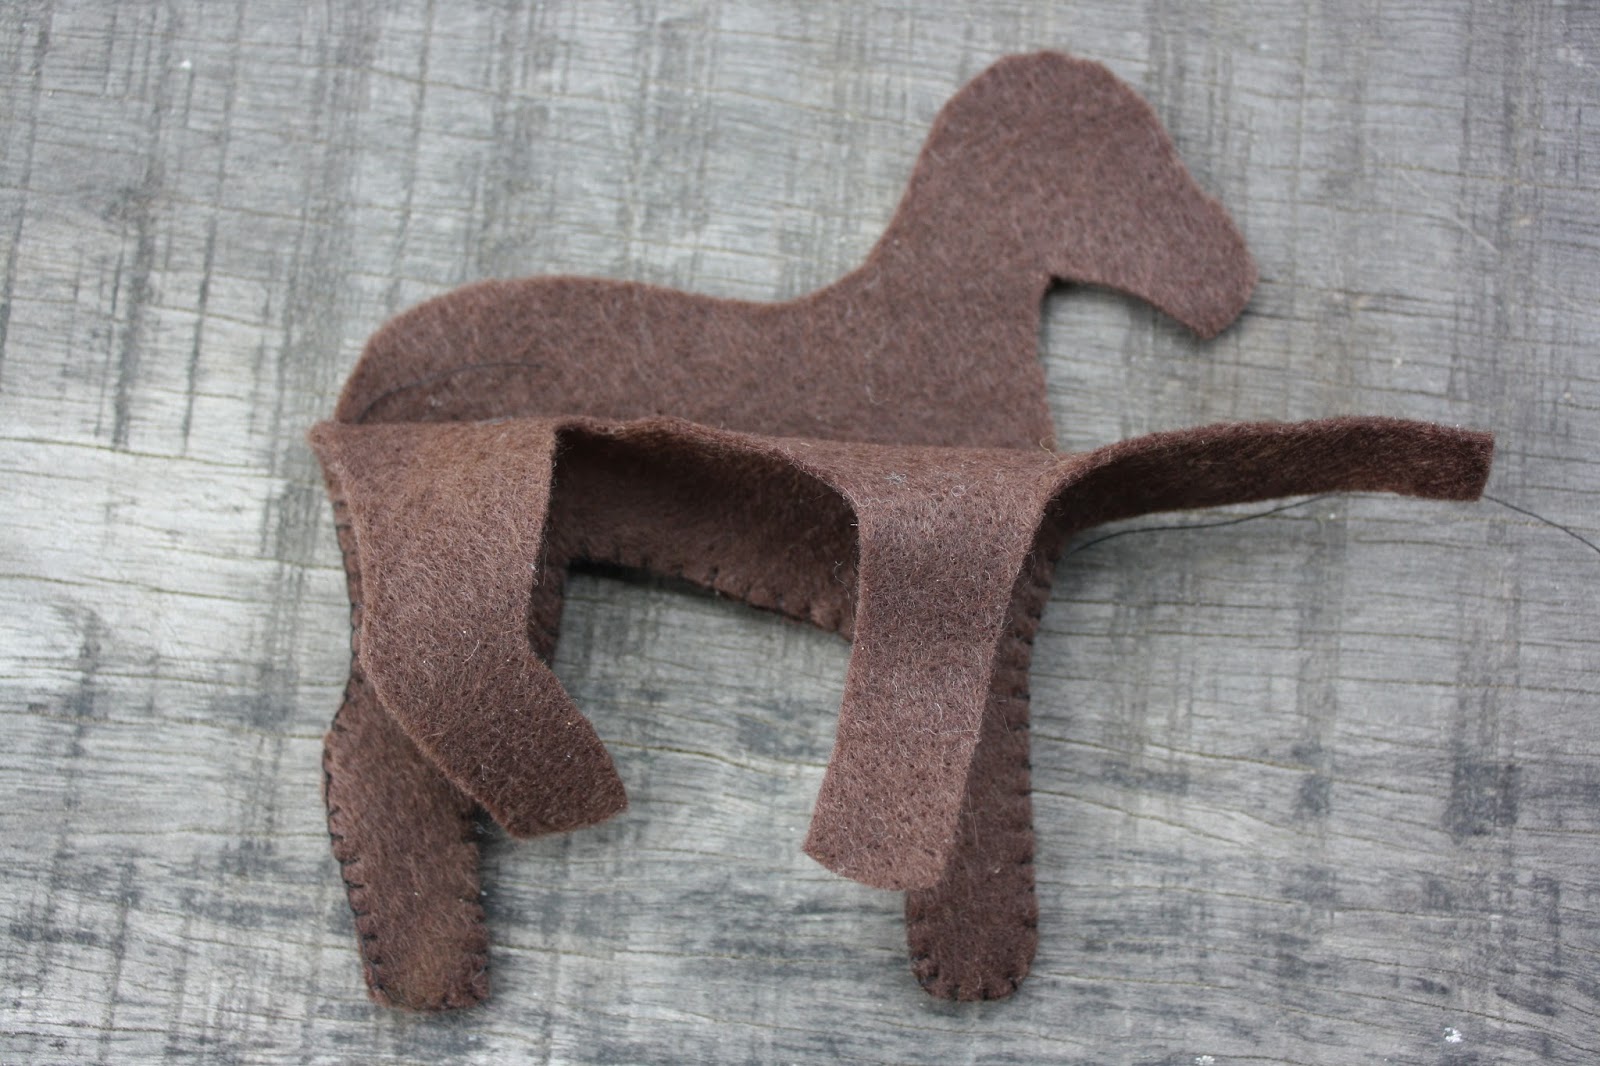
3. Carry on blanket stitching up the neck (it is a bit difficult)


4. Then do the same with the other side.


5. Take two wires and make a "U" shape with them, you may also use pipe cleaners or "U" nails.


6. Put some stuffing into the legs then place the "U" shaped wiring in. Place more stuffing on top to secure.


7. The horse should be able to stand up now, Place some more stuffing in to fill the shape out.


8. Now make the tail out of yarn by wrapping it around your fingers (much longer than you want it) and tying it on one side.


9. Start stitching up his back form his bottom and place the tail (not too far down or it will look like something else) and stitch the tail into the back with the knot inside.


10. Carry on blanket stitching across his back and stop at the base of his neck as shown.


11. Begin to attach his head starting from the neck and going along (stop at the 'V' shape)


12. Once you have finished both sides, stuff the rest of his body and face to fill him out.


13. Time to make the main, Make many "tails".


14. Attach the first on in the middle of the 'V' shape on his head.


15. Carry on down his main until you finish, make the eyes and snip some loose thread.


And you are done!


Leave your questions, comments or even your hand made horses in the comments bellow. =)


Thursday 3 September 2015


The Root Children


Story and photos


This story is suitable for older children (3-6) and is
 typically told in the beginning of spring. It is a variation that I made from
the classic book "The Story of the Root Children".


Under the ground deep in the earth, among the roots of the trees, the little root children were sleeping all winter long. They felt nothing of the biting wind, the cold frost or the stinging hail storms. They slept peacefully in their warm burros. The root children were dreaming of the sun shine and spring flowers until one day Mother Earth came along to gently wake them up. “Wake up children, wake up. There is lots of work to be done, spring is coming and I have brought you scissors, needles and cloth, wake up. As soon as you are ready I will open the doors of the ground.” The children yawned and stretched, then they jumped up merrily. “Yay spring is coming!” Mother Earth had lots of material of lots of different colours for the children so each can make their own special spring creation. The leaf child chose different green coloured cloths, the flower child chose lots of bright coloured cloths and the incest child chose dark coloured cloth. They sat down and started sewing, cutting and pressing so that everything fitted just right.
The insect child finished first, “Lots of worms, grasshoppers, bees and butterflies, Each with their own purpose on this earth.” She said. The leaf child finished second, his leaves large and bright. “This would protect all the trees and give shade to the animals” he said. Lastly the flower child finished, her flowers as bright as the sun. “These flowers will make the world look beautiful and give food to the insects.” The flower child said.
Up above the warm sun has been shining on the earth. The trees were ready to grow some leaves, the flowers were ready to bloom and the insects were ready to hatch. At last it was really spring time, mother earth opened her door and each child walked up with their creations into the sun shine. They got to work and it didn’t take them long to finish. When their work was done the children played all spring long.


Thanks for reading my content, please comment and tell me what you would like to see and I can make it happen! You may also post critiques of your own experiences with the stories and resources.


Wednesday 2 September 2015

Sweep It All Up

Sweep It All Up 

Story, Pattern and Tutorial


This is a classic therapeutic Waldorf story which is great for children who have trouble cleaning up. It's nice and repetitive and suitable for children between 2 - 6


 Story


Three little men had three little hats
three little men together
Red cap, Blue cap and golden cap too
Living in a house together, sharing a house together
They had a broom and it lived in the corner of the room
But they did not know how to use it properly
So there were crumbs crumbs everywhere
All over the table and under the bed
And even under the pillow where they rested their heads!
And the broom would sigh and say "If only they would use me properly, I could clean up the room in a twinkling of an eye"
Now when it was little blue caps turn to sweep he would sing his couldn't be bothered song.
"I couldn't be bothered, i couldn't be bothered, I couldn't be bothered to work, All through the day I would just like to play and sweeping is something I shirk."
So the room was just as messy as it was before - 
there were crumbs crumbs everywhere
All over the table and under the bed
And even under the pillow where they rested their heads!
Now when it was little red caps turn to sweep he would sing his swishity swat song.
"Swishity swat, swishity swat, this little broom goes this way and that!"
 So the room was just as messy as it was before - 
there were crumbs crumbs everywhere
All over the table and under the bed
And even under the pillow where they rested their heads!
Now when it was little red caps turn to sweep he would sing his swishity swat song.
Now one day little gold cap came to visit and he said "This is the messiest house I ever did see!" And he sang his sweep it all up song.
"Sweep it all up, sweep it all up, this little broom will sweep it all up, crumbs in a pile will make me smile, this little broom will sweep it all up."
He swept under the table and under the bed, and even under the pillow where they rested their heads.
And when the room was all tidy, the broom went to sleep in the corner of the room and red cap, blue cap and golden cap sat down for their morning tea.


Tutorial


Pattern, you may alter the size depending on how big you want it


1. Make the clay head and body to scale of the 'clay head' and 'clay body' pattern. (I used a light clay so that it was easier to paint)

2. When the clay is still wet, stick half a tooth pick down the middle of the body and the head so that it fits snugly together, leave to dry

3. Once dry, the head should slip off (depending on the type of clay) so you are able to super glue it together. If it doesn't slip off then skip this step.

4. Paint the body white and then paint the skin and face.

5. Cut out the coat and blanket stitch around the outside, then join together around the body and stitch together (you are able to glue it on the body to stop it slipping around)

6. Cut the hat out and blanket stitch  the two long edges together to form a cone, this should slip onto his head nicely (you are also able to glue this on to stop slipping)

7. Do this in the three colours (golden, red and blue), then make the mat, bed out of felt. You are able to make the table and chairs from stones or random household items.

and you are done!